
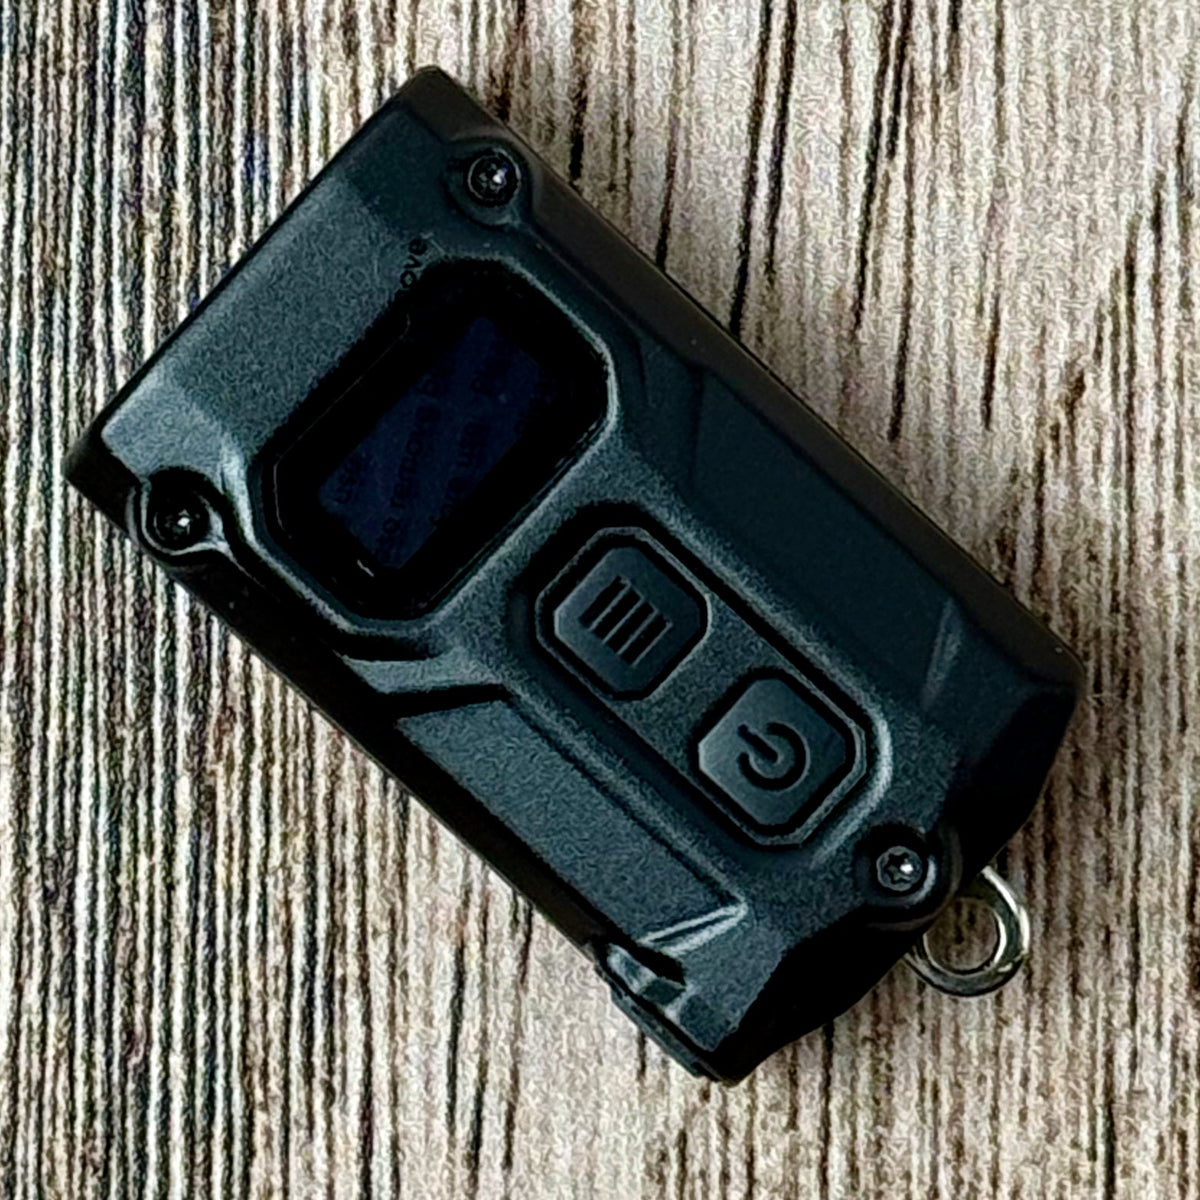
To stop an EDC flashlight turning on in your pocket, use its documented lockout mode before carrying it, then keep the switch away from pressure from keys or other gear. Turning the light off is not the same as locking it. If your light offers partial and full lockout, choose the setting that disables every activation shortcut for pocket or bag storage.
You do not necessarily need a new flashlight. First learn what the one you carry can do, confirm that the lock actually engaged, and check it again after charging. This guide explains the differences, gives two model-specific examples, and helps you work out why accidental activation keeps happening.
Why an “off” flashlight can still turn on
An unlocked switch is waiting for an input. A key fob, another tool, or the edge of a pocket can supply that input just as your finger would. Changing brightness or choosing a low mode does not disable the switch.
Start by separating two problems: preventing activation and managing light output after activation. A timer or temperature-control feature belongs to the second group. Neither is a reason to put an unlocked light into a crowded pocket.
A covered light can also build up heat. Nitecore's TINI3 manual specifically calls for full lockout in enclosed or flammable environments such as a backpack. Follow the warnings for your own model, and keep an operating light's outlet clear.
Full, partial, and physical lockout: what changes?
| Setting | What to check | Practical tradeoff |
|---|---|---|
| Electronic full lockout | Does it disable all ways to turn on the main beam? | You must perform the unlock sequence before normal use. |
| Partial lockout | Does a long press or another shortcut still activate a light mode? | Quick access remains useful, but it may also remain accessible to pocket pressure. |
| Documented physical lockout | Does the manufacturer specify a mechanical lock or a way to disconnect power? | Restoring operation may require a separate physical action. |
| Off, with no lock engaged | Can an ordinary press turn it back on? | Fast access, with the switch still exposed to accidental input. |
These are categories, not universal button instructions. A lock can behave differently even between two lights from the same brand. Use the manual for the exact model and generation, including any behavior after charging.
Do not assume loosening a tailcap works on every light
Some designs support a physical power disconnect; sealed keychain lights and other designs may not offer a user-removable cap at all. Use a physical method only when the maker documents it. Do not force open a sealed light or apply an arbitrary “quarter-turn” instruction to an unfamiliar model.
If the light has no suitable lock, give its switch a protected place in your carry setup. A separate compartment or a properly fitting holder can reduce contact with other objects. It still needs checking: a holder that presses the switch has defeated its purpose.
Two examples: learn the sequence for your light
Nitecore TINI3: choose FULL LOCK for enclosed carry
The Nitecore TINI3 offers two electronic lockout settings. Semi lockout leaves momentary Turbo accessible through the Mode button; full lockout blocks activation through both buttons.
- With the light on, hold the Power button until the display confirms FULL LOCK.
- To unlock, hold both buttons until the on-screen progress bar fills. The light enters Ultralow.
- Charging automatically unlocks it. Re-engage lockout before putting it back into your pocket or bag.
These instructions come from the TINI3 user manual. For choosing between carry sizes rather than troubleshooting controls, read our TINI 3 vs. T4K comparison.
Olight Baton 4: keep holding past Moonlight
According to the Baton 4 manual, start with the light off and hold the side button for about two seconds. Moonlight briefly turns on, then turns off as the button locks. Releasing when Moonlight first appears leaves you with a light that is on, rather than locked.
While locked, a short press shows the battery level without lighting the main beam. To unlock, hold the button for at least one second; Moonlight activates. The battery indicator responding to a press therefore does not, by itself, mean lockout failed.
Keep these instructions specific to the Baton 4. Our Baton 4 vs. Premium guide covers the separate question of whether the charging case suits your routine.
A quick check before pocket carry
- Confirm the setting. Look for the manual's confirmation, such as a display icon or the specified light response. Do not judge solely by whether the beam is off.
- Check the documented exceptions. Learn whether the lock leaves any momentary output available. Try the ordinary activation controls with the beam pointed safely away from eyes.
- Give the switch room. Keep keys, tools, and pocket edges from bearing directly against it. Consider what happens when you sit, bend, or put a bag down.
- Recheck after charging. Charging can change lock status on some models. Make locking the light the last step before returning it to its carry position.
- Practice unlocking deliberately. Learn the sequence in a well-lit place so the extra action is familiar when you need the light.
If accidental activation continues, change one thing at a time: confirm full rather than partial lockout, separate the light from loose gear, then check whether the problem follows charging. A switch that activates without the documented input, or a damaged device, calls for manufacturer support rather than another improvised carry trick.
What matters when buying a replacement?
Ask whether you can comfortably use the lock every day. A feature you routinely skip because its sequence is awkward does little for your carry routine. Look for an understandable confirmation, a manageable unlock action, and a switch position that fits the pocket or bag where the light will live.
Choose size, beam, and runtime for the actual job too. Our EDC flashlight selection guide explains those broader tradeoffs. Lockout should be part of that decision, rather than an excuse to buy more output than you need.
Frequently asked questions
Does a low brightness setting prevent pocket activation?
No. It changes output, not whether a switch can turn the light on. Use the documented lock and check which shortcuts, if any, remain active.
Is a locked flashlight's battery necessarily dead if it will not turn on?
No. Check the documented unlock sequence first, then the battery or charging procedure. An intentionally disabled switch can look like a power problem.
Do I need to lock a light carried in a bag?
A bag can press against switches too. Use the maker's recommended storage setting and avoid packing the light where loose objects can hold a control down.
Make lockout part of putting the light away
The most useful fix is a repeatable routine: finish using the light, engage the appropriate lock, confirm it, and return it to a place that protects the switch. Check again after charging. Replace the light only if its controls or carry format consistently fail to fit that routine.
Gear mentioned
Nitecore TINI3 — black, with NSticker bundle. Worth considering for a small keyring light with an on-screen lock status. The tradeoff is a two-button unlock action, plus remembering to lock it again after charging. The linked Amazon package includes the black TINI3 and NSticker; it is not the larger T4K.
Affiliate disclosure: As an Amazon Associate I earn from qualifying purchases. We may earn a commission when you buy through this link.
View on Amazon (paid link; opens a new tab)